GUIDELINE FOR WORKING WITH TOOLBOX :
Following points should be kept in mind while using toolbox .
Following points should be kept in mind while using toolbox .
| Abode Photoshop tools information |
- 1) Letter shown in the bracket of the tool is the short cut to across the tool . Press that key to directly across that tool .
- 2) Click on the triangle lower right corner of the tool to see group tool.
- 3) Press ALT key and click on the group tool of any tool to scroll it. Press shift key and short cut key of the tool to scroll the tool.
- 4) Press Tab key to across all the palette to show or hide all the palette together. Press shift key together to show or hide all the palette except toolbox.
- 5) Press Caps lock key to turn printing cursor into cross hair shape.Press once again on caps lock key to bring standard cursor back.
This tool is used to give internet link ,Draw rectangle on photograph called frame and then click on the frame to give link to web page, image or HTML page . To do so,double click on the frame prepared by slice selection ,so, Slice Option dialog box will open.
It has two slice type options. First option is <image>, which has some option as shown in the dialog box.
Type image names in the name box, and type URL box to open that link by clicking on the slice. Target box is used to show how to display link for example.
http://www.yahoo.com , written in the above box. You can give following targets in it :
| Abode photoshop : slice tool in photoshop |
- 1) blank : Shows the link in the browser window and current page remains open.
- 2) self : Shows the link in the same frame as original frame.
- 3) parent : This option is used when there is HTML frame in the link file . It shows the link in the whole frames set.
- 4) top : Changes current browser window with link file file and removes all the frames of the current
- page : It has Message Text option in the option box. The text typed in this box is displayed in the status bar of the web browser window,when you put mouse pointer on the slice.
- HEALING BRUSH TOOL
This tool has 4 sub tools.
- Spot Healing Brush tools
- Healing brush tools
- patch tool
- Red eye tool
| Abode Photoshop : Healing brush tools in photoshop |
- Stop Healing Brush Tool
This tool is to remove imperfection from the image
- HEALING BRUSH TOOL
This tool is used to clone one part of the image and apply it to another part.
- PATCH TOOL
This tool is used to improve any part of the image using selecting part. This tool automatically adjust lighting shading brightness contrast etc like to source image.
- TO APPLY PATTERN
Selected required pattern from the pattern option of the option bar and click on use pattern button, to apply selected pattern on the selected area of the image. It will automatically adjust lighting ,shading, brightness , etc.
- RED EYE TOOL
This tool is to remove red eye effect from prints, film or digital file. This the new tool in the Photoshop cs3 , because of this process become easy . because of camera reflection. effect flash falling on the retina there is red eye effect on the eye. To remove it, select pupil size from the default setting " Feed the size of your subject eye in the option bar of this tool so selected black or gray color will appear before red eye.
- BRUSH TOOL
When this tool used to paint, mouse pointer is converted into brush shape. Drag the mouse to pointer to, the foreground color remains as it is
step 1 : select the brush tool from the tool box
step 2: Select brush of different styles from the brush. preset picker in option bar .
step 3 : Click on the foreground color box . so, color picker palette will open . now select color from it .
step 4: Drag the mouse of the image to apply brush tool effect on the image.
 |
| Abode photoshop : Brush tool in photoshop |
- PENCIL TOOL
This tool works same as paint brush tool, but it has brushes having dark border . so, you can not apply effect of smooth edge stroke.
- COLOR REPLACEMENT TOOL
This tool is used to replace with one color with another color in the image. Option bar of this as difference options like brush size, color, mode, limits, etc.Anti-alias option is used to smooth edge, so, different effect can be applied in color replacement.
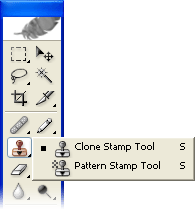
- COLOR STAMP TOOL
This tool is used to from one part of the image and applied to an another part. pattern can also be applied on any
 |
| Abode Photoshop : Clone Stamp Tool in photoshop |
- Clone Stamp tool :
This tool is used to clone any part of the image.
- Pattern Stamp Tool :
This tool is used to apply clone on any part of the image.
*This tool can not be used for bitmap file, index file or multi channel color Mode file.
- CLONE STAMP TOOL :
Step 1: Select clone stamp tool from the tool box and press ALT key and click on the image to be cloned.
Step 2 : Drag the mouse on the area to clone to copy that image.
* You can select the brush of different size from the option bar and increase to decrease the opacity
option to give transparent effect to image.
- PATTERN STAMP TOOL
This tool is used to made drawing of the pattern made by selecting any part of the image .Using rectangle marquee tool.
Select the part of the image to make pattern and select different pattern option to from the edit menu. Now cancel the selection and use the same or new image and draw using pattern stamp tool to apply or fill pattern in the image . You can also use the default pattern of the Photoshop.
Option of this tool are same as clone stamp tool .
*Select should be square while making pattern.
This tool is used to apply effect to image from any state of the history palette.
step 1:first open the history palette and click history brush tool
step 2:click on the box left to the state to be apply to the image.so,brush icon will appear
step 3:set brush size opacity and drag on the image.so,effect of the selected state from the history palette will be filled on the drag area of the image.
This tool is apply stylize stroke effect using history state or snap shot .Is fidelity option of this tool is more than you can apply stroke with more colors . Area option defines covered stoke area .Spacing option defines the space between to strokes.
This tool is used to erase any part of the image .To do so ,select eraser tool and click on the part of the image to be erased ,and drag the mouse button .Thus,selected part of the image will be erased .
Select erase to history palette option ,to bring back pixel of certain states of history palette.
When this tool is used to color of the image of the part of image comes in the background of the tool box. If background layer is erased then instead of background color area becomes transparent .
This tool works on the theory of magic wand tool, selects the similar color area according to tolerance while magic eraser tool deletes the similar color area according to tolerance .
This tool is used to give different tool shade in the image. It is also used to create shade by making two or more color .
There are five different option in the option bar to create shades in a different ways.
This tool is used to fill color in the selected area. First selected the area using selection tool to fill color . Then click on paint bucket tool and selected color from the scratches palette or color palette. Now bring the pointer in the selected area, so, it will be converted in the shade then click to fill color.
This tool is used to make image smooth. Image will become smooth as per increase in pressure of option bar.
Step 1 : Select blur tool from the tool box.
Step 2 : Click and drag mouse on the image to give blur effect.
You can see from this image, that image becomes smooth because smooth because of blur effect.
This tool is used to sharpen the image means to add more colors pixel. It is opposite to the blur tool.
This to is used to give effect similar to moving finger on the wet image. You can apply figure stroke to the image. In short ,you can apply effect similar to one how color spreads when water falls on it.
Put pointer on image and drag it. So,area from foreground color to the pointer will smudge. You can see color stroke because of smudge effect in the given figure.
This tool is used to increase brightness of the image. For that there are different ranges in the option bar like midtones, Shadows ,Highlights etc. Which are to use tool in different ways.
Select Highlight option to make part bright which is light and select shadow option to make part bright that is dark.
This tool is used to darken the image ,means it works opposite to the dodge tool.
This tool is used to increase or decrease color saturation in the image.
Saturation means overflow.If you saturate the color ,then it becomes dark or we can say with more contrast and if you de-saturate the color then color will be less or no color means image will become black& white .
Select the option to saturate or de-saturate the image and drag the mouse on the image.
This tool is used to move drawn shape or the path shape.
This tool is used to edit the selected path or shape.
Select type and click on the palette button in the option bar so,its palette with extra option will open,which has different option for character and paragraph.
It has commands for character like font,size,style,and some more options.You will learn its use in chapter 5.
*NOW LAYER OF THE TEXT IS CREATED WHEN YOU TYPE USING TEXT TOOL.
PEN TOOL:
This tool has total 5 sub tools .
This tool is only one of the Photoshop ,which is used to change font size giving desired shape or design.it is used to draw curve and random line .
step 1.select pen tool from the toolbox
step 2.click the mouse pointer in the work area ,so,first anchor point or square node will appear Then click once again ,so,another mode and a line joining both will also appear .
POINT TO BE REMEMBERED TO COMPLETE THE PATH :
*Press ctrl key and click left mouse button to complete the path from the middle.
*bring the mouse pointer on first anchor point and click mouse button on it.
*PRESS HOLDING SHIFT KEY TO DRAW STRAIGHT LINE .
This tool is used to draw path on the screen using mousing just like free hand lasso tool.
click on the starting point on the path and continue drawing without releasing the mouse to make path.
This tool is used to add anchor point in the path and to edit it.select this tool and click on that place to add point.
This tool is used to delete unwanted or additional point from the path .Select this tool and click on the unwanted point to delete it.
This tool is used to convert curves of the path and the angles to do (C) to (<) select the curve point and click on this tool. so, there will be angle of instead of curve.
This tool has total 6 sub tools.
This tool is used to draw square or rectangle.
This tool is used to draw square or rectangle but it is corner will be seen rounded.
This tool is used to draw oval or ellipse
This tool is used to draw line. To do so set line width in the option bar.
This tool is used to draw angle like triangle pentagon ,hexagon etc.Type no. of sides in the option bar to draw angle . For example .type no. of sides 5 to draw pentagon.
This tool is used to draw different shapes except geometrical shapes .Option bar shows deafult shapes of this tool.
Rectangle will be drawn on releasing the mouse button but foreground color will be filled in it.
This tool has total 2 sub tools.
This tool is used for internet purpose . You can give written description of the image when you put it on the internet. User can see the written description of the image when they click on note icon.
This tool works same as notes tool but when user click on it icon . It plays recorded sound instead of written text. To do so , select audio annotation tool and click when sound to be added.
Press the start button and record sound with the help of microphones. Click on stop button to finishing recording .Now if you can audio icon on the image in the web browser recorded sound will play.
Sound should be less and more informative because it text more time for the sound to download and to play on the internet.
This tool has total 4 sub tools.
This tool is used to set any color of the image as fore color.
This tool is used to take color sampler from different parts of the image.
This tool is used to measure length /width and angle of any part of the image.
This tool is used to count item manually in the image. To do so, select count tool and click .
To show or hide count number ,click on view > show > count or analysis > record measurement.
Count number will not be saved with the document.
If image is big in size or it is zoom then instead of scroll bar this tool is used to move it up and down or left or right.
This tool is used to change the image view, means to enlarge the image,
To reduce the image size,select this tool and press ALT KEY and click on the image.
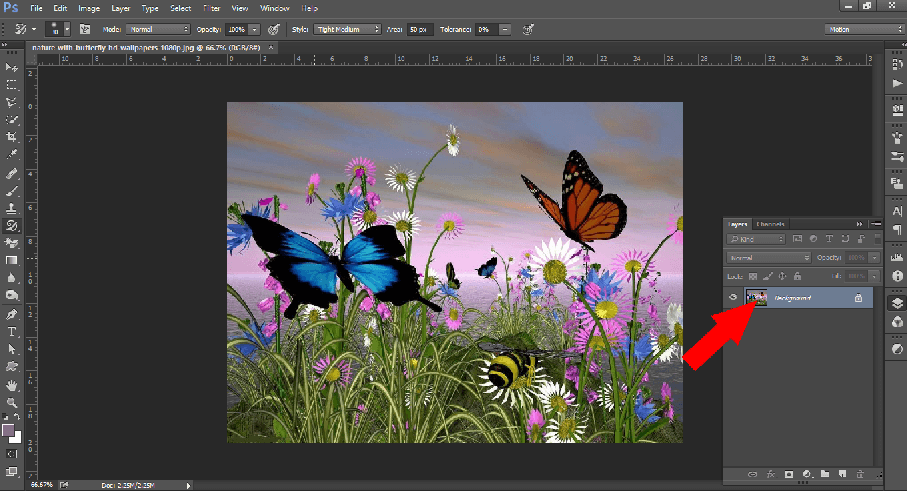
- HISTORY BRUSH TOOL
This tool is used to apply effect to image from any state of the history palette.
step 1:first open the history palette and click history brush tool
step 2:click on the box left to the state to be apply to the image.so,brush icon will appear
step 3:set brush size opacity and drag on the image.so,effect of the selected state from the history palette will be filled on the drag area of the image.
 |
| Abode photoshop : History Brush Tool in Abode Photoshop |
- ART HISTORY TOOL
This tool is apply stylize stroke effect using history state or snap shot .Is fidelity option of this tool is more than you can apply stroke with more colors . Area option defines covered stoke area .Spacing option defines the space between to strokes. |
| Abode photoshop : Art history tool in photoshop |
- ERASER TOOL :
This tool is used to erase any part of the image .To do so ,select eraser tool and click on the part of the image to be erased ,and drag the mouse button .Thus,selected part of the image will be erased .Select erase to history palette option ,to bring back pixel of certain states of history palette.
- BACKGROUND ERASER TOOL :
When this tool is used to color of the image of the part of image comes in the background of the tool box. If background layer is erased then instead of background color area becomes transparent .| Abode photoshop :How To Use The Background Eraser Tool In Photoshop |
- MAGIC ERASE TOOL :
This tool works on the theory of magic wand tool, selects the similar color area according to tolerance while magic eraser tool deletes the similar color area according to tolerance .
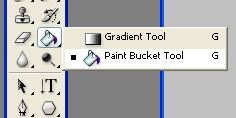
- GRADIENT TOOL :
This tool is used to give different tool shade in the image. It is also used to create shade by making two or more color .There are five different option in the option bar to create shades in a different ways.
Abode Photoshop : Paint Bucket in photoshop
- PAINT BUCKET TOOL :
This tool is used to fill color in the selected area. First selected the area using selection tool to fill color . Then click on paint bucket tool and selected color from the scratches palette or color palette. Now bring the pointer in the selected area, so, it will be converted in the shade then click to fill color.| Abode Photoshop : Paint Bucket in photoshop |
- BLUR TOOL :
This tool is used to make image smooth. Image will become smooth as per increase in pressure of option bar.Step 1 : Select blur tool from the tool box.
Step 2 : Click and drag mouse on the image to give blur effect.
You can see from this image, that image becomes smooth because smooth because of blur effect.
- SHARPEN TOOL :
This tool is used to sharpen the image means to add more colors pixel. It is opposite to the blur tool.
- SMUDGE TOOL :
This to is used to give effect similar to moving finger on the wet image. You can apply figure stroke to the image. In short ,you can apply effect similar to one how color spreads when water falls on it.Put pointer on image and drag it. So,area from foreground color to the pointer will smudge. You can see color stroke because of smudge effect in the given figure.
 |
| Abode Photoshop : blur-sharpen - smudge tool in Abode photoshop |
- DODGE TOOL :
This tool is used to increase brightness of the image. For that there are different ranges in the option bar like midtones, Shadows ,Highlights etc. Which are to use tool in different ways.Select Highlight option to make part bright which is light and select shadow option to make part bright that is dark.
- BURN TOOL :
This tool is used to darken the image ,means it works opposite to the dodge tool.SPONGE TOOL :
Saturation means overflow.If you saturate the color ,then it becomes dark or we can say with more contrast and if you de-saturate the color then color will be less or no color means image will become black& white .
Select the option to saturate or de-saturate the image and drag the mouse on the image.
| Abode Photoshop : Dodge- burn-sponge tool in abode photoshop |
- PATH SELECTION TOOL :
This tool is used to move drawn shape or the path shape.
- DIRECT SELECTION TOOL :
This tool is used to edit the selected path or shape.
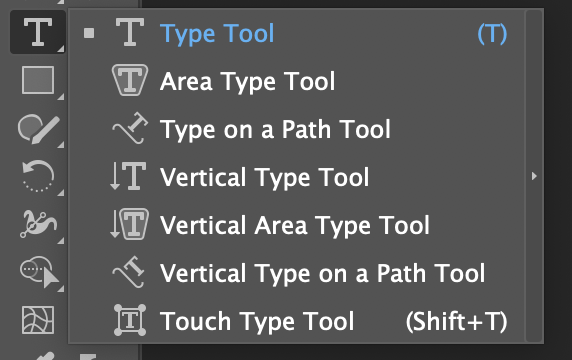
- TYPE TOOL :
Abode photoshop : Type tool in abode photoshop
Select type and click on the palette button in the option bar so,its palette with extra option will open,which has different option for character and paragraph. |
| Abode photoshop : Type tool in abode photoshop |
It has commands for character like font,size,style,and some more options.You will learn its use in chapter 5.
- LERNING :This option is used when you find some letter combination in the word,so, spacing between two letters look uneven.For e.g.A/VION word ,space between letter A and V is considered from the button right corner of A to the top of the left corner of v . so, space between A and V seems more. to set this you can give different value in the terming . metrics option is more beneficial.
- LEADING :This option is used to set space between two lines.
- TRACKING :this option is used to set space between two characters .
- SCALE CHARACTER HORIZONTALLY/VERTICALLY :This option is used to change horizontal and vertical scale of the character means to change its height or width.
- BASELINE:This option is used to move up or down the selected character from the imaginary line below the point of baseline character .
- COLOR :It is used to change color of the character
*NOW LAYER OF THE TEXT IS CREATED WHEN YOU TYPE USING TEXT TOOL.
PEN TOOL:
This tool has total 5 sub tools .
- 1.pen tool
- 2.perform pen tool
- 3.add anchor tool
- 4.delete anchor point tool
- 5.covert point tool
- PEN TOOL:
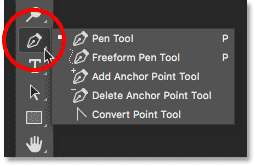
Abode photoshop :Pen Tool In Abode Photoshop
This tool is only one of the Photoshop ,which is used to change font size giving desired shape or design.it is used to draw curve and random line .| Abode photoshop :Pen Tool In Abode Photoshop |
step 1.select pen tool from the toolbox
step 2.click the mouse pointer in the work area ,so,first anchor point or square node will appear Then click once again ,so,another mode and a line joining both will also appear .
POINT TO BE REMEMBERED TO COMPLETE THE PATH :
*Press ctrl key and click left mouse button to complete the path from the middle.
*bring the mouse pointer on first anchor point and click mouse button on it.
*PRESS HOLDING SHIFT KEY TO DRAW STRAIGHT LINE .
- FREE FROM SELECT TOOL:
This tool is used to draw path on the screen using mousing just like free hand lasso tool.click on the starting point on the path and continue drawing without releasing the mouse to make path.
- ADD ANCHOR POINT :
This tool is used to add anchor point in the path and to edit it.select this tool and click on that place to add point.
- DELETE ANCHOR POINT
This tool is used to delete unwanted or additional point from the path .Select this tool and click on the unwanted point to delete it.
- CONVERT POINT
This tool is used to convert curves of the path and the angles to do (C) to (<) select the curve point and click on this tool. so, there will be angle of instead of curve.
- SHAPE TOOL
This tool has total 6 sub tools.| Abode Photoshop : shape tool in abode photoshop |
- rectangle tool
- Rounded rectangle tool
- Ellipse tool
- polygon tool
- Line tool
- Custom shape tool
- RECTANGLE TOOL :
This tool is used to draw square or rectangle.
- ROUNDED RECTANGLE TOOL :
This tool is used to draw square or rectangle but it is corner will be seen rounded.
- ELLIPSE TOOL :
This tool is used to draw oval or ellipse
- LINE TOOL :
This tool is used to draw line. To do so set line width in the option bar.
- POLYGONAL TOOL :
This tool is used to draw angle like triangle pentagon ,hexagon etc.Type no. of sides in the option bar to draw angle . For example .type no. of sides 5 to draw pentagon.
- CUSTOM SHAPE TOOL :
This tool is used to draw different shapes except geometrical shapes .Option bar shows deafult shapes of this tool.Rectangle will be drawn on releasing the mouse button but foreground color will be filled in it.
- NOTES TOOL :
This tool has total 2 sub tools.- NOTES TOOL
- AUDIO ANNOTATION TOOL
- NOTES TOOL :
This tool is used for internet purpose . You can give written description of the image when you put it on the internet. User can see the written description of the image when they click on note icon. |
| Abode photoshop : Notes tool in abode photoshop |
- OPTIONS :
- 1) AUTHOR : It is used to displays name of person in the notes title , who has typed the notes. It can be changed by "AUTHOR" option.
- 2) FONT : It is used to change the font displayed in the notes.
- 3)SIZE : It is used to change a font size typed in the notes.
- 4) COLOR : It is used to change the color of title bar of the notes.
- 5) CLEAR ALL: It is used to delete all the notes of the image.
- AUDIO ANNOTATION TOOL :
This tool works same as notes tool but when user click on it icon . It plays recorded sound instead of written text. To do so , select audio annotation tool and click when sound to be added.Press the start button and record sound with the help of microphones. Click on stop button to finishing recording .Now if you can audio icon on the image in the web browser recorded sound will play.
Sound should be less and more informative because it text more time for the sound to download and to play on the internet.
- EYE DROPPER TOOL :
This tool has total 4 sub tools.- eyedropper tool
- color sampler tool
- ruler tool
- count tool
- EYE DROPPER TOOL :
This tool is used to set any color of the image as fore color.
- COLOR SAMPLER TOOL :
This tool is used to take color sampler from different parts of the image.
- RULER TOOL :
This tool is used to measure length /width and angle of any part of the image.
- COUNT TOOL :
This tool is used to count item manually in the image. To do so, select count tool and click .To show or hide count number ,click on view > show > count or analysis > record measurement.
Count number will not be saved with the document.
- HAND TOOL :
If image is big in size or it is zoom then instead of scroll bar this tool is used to move it up and down or left or right.
- ZOOM TOOL :
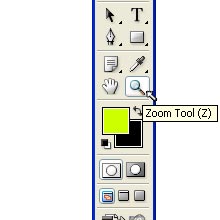
Abode photoshop : zoom tool in abode photoshop
This tool is used to change the image view, means to enlarge the image, |
| Abode photoshop : zoom tool in abode photoshop |
To reduce the image size,select this tool and press ALT KEY and click on the image.